Monday, March 25, 2024

Deck Profile: Oni Assassins

The Oni Assassin deck is next up! I don't think my deck is going to be too different than what many people will play with the end of game card options. It may be plus or minus a few card numbers here and there. What is frustrating is I would like to optimize the gameplay strategy for the deck but I seem to struggle to make it go off more often. If anyone has any suggestions to make my loop work better, I'm all ears. Next, if you would like to see a video of me explaining the deck, check out the video below:

Before I explain the deck, let's run down the deck list.


Monsters:
Size 0:

Size 1:

Size 2:

Size 3

Item:

Spells:

Sideboard:

Main Deck

Anyone familiar with Oni Assassins will see that I'm going with the discard playstyle. I want to get Mountain Deity Oni Blade, Kid Ibuki on the field as much as possible to force the opponent to discard cards. If anyone has any ideas on how to make this occur more consistently, please let me know. Right now, it feels rather hit or miss. Usually I can get it to trigger at least once a turn but if I can get it to trigger 2-3 times a turn, that would be cool but I also understand if I'm reaching for the stars here.

Anyways, onto the card explanations.

Oni Horde, Underworld Legion - Let's start with the only size 0, Oni Horde. He has soulguard and is free to call (but you can add a card from hand into his soul if you want). His last ability is when an Oni Assassin monster enters the field by ambush, deal 1 damage to the opponent and this triggers once per turn so you'll want to trigger that on each player's turn to get the most bang for your buck.

Oni Horde is the ideal card to have in the center and stack him up with facedown souls. The issue is there is no consistent way to search him out so you sometimes have to improvise with other Oni Assassins in the center until you draw into him.

Lady Oni, Uji Bridge Princess - Uji Bridge Princess is also free to play but have the option to add a soul facedown before calling her. Other than ambush, her other ability lets you gain a gauge when she enters the field and if she entered the field by ambush, gain another gauge. She's primarily there just for the gauge gain. Sure, you could use her for facedown soul set up (and it's totally fine to do so) but normally, Oni Horde should get the souls. 

Fiend of Gaze, Ayo - I made Ayo the buddy only because he's super easy to call and there's no real situation you wouldn't want to call him to the field. Feel free to choose another monster you like. Even Uji Bridge Princess would be fine.

Ayo has ambush and when he enters the field, pick an Oni Assassin on your field, you check the top 3 cards of the deck, put one facedown into the card you chose. The rest go to the bottom of the deck. This skill helps dig out ambush monsters from the deck into the field.

Also, remember that if you have a size 3 ambush monster and Ayo go to the drop at the same time, you can call Ayo first, call Ayo over with the size 3 monster then, trigger Ayo's ability and choose the size 3 monster on the field. I won't go into the details why here but I go into more depth on the Oni Assassins Archetype Archive post.

Fiend of Ailments, Affliction Oni - Affliction Oni is basically the item tutor for the deck. In order to have enough gauge to play this deck optimally, you'll need the item as soon as possible. To do this, I run three copies of Affliction Oni. Worst case, if you get more than 1 Affliction Onis, just grab more copies of the item. It helps filter out unneeded cards out of the deck and it's free to use them to charge and draw in the draw phase.

Red Lady Oni, Kureha - Kureha costs 1 gauge and has ambush and move. Her main skill activates when she enters the field. You can take a card with ambush in the drop zone other than herself and add it to hand. Then, if Kureha entered the fields by ambush, put a card from your hand into the soul of an Oni Assassin on the field. It doesn't have to be the card you grab from the drop either.

Also, just like Ayo above, if Kureha and a size 3 ambush monster go from a facedown soul to the drop at the same time, you can delay activating her effect. You can call Kureha first, then call over her with a size 3 monster then, use her enter-on-field effect to grab a card, put it to hand and put a card facedown into a field card's soul.

Mountain Deity Oni Blade, Kid Ibuki - The main size 3 of the deck. He's quite expensive at 2 gauge and 1 life to call. He innately has ambush and triple attack. His main skill is, when he enters the field, choose an Oni Assassin on the field, check the top 5 cards of your deck, put up to two cards from among them into its soul facedown and put the rest of the cards on the bottom of the deck. Then, if Kid Ibuki entered by ambush, your opponent discards a card from hand.

Kid Ibuki's discard effect is the main purpose of the deck. We want multiple ways to get Kid Ibuki either from deck or drop back into the facedown soul of cards on the field.

 "Shuten Demonic Deity" Kid Ibuki - Shuten Kid Ibuki costs 2 gauge with ambush and move. His first skill board wipes the opponent's monsters on the field and damage your opponent equal to the number of cards destroyed at the beginning of the Oni Assassin player's turn. This is nice if it destroys anything at all but more often than not, it will not. This Kid Ibuki is more of a "get a free turn" card and is not the main card to always play.

His Overkill is the main reason to play this. His Overkill costs 1 gauge when a monster would be destroyed, choose a monster and for the turn, that monster cannot be destroyed at all. If the opponent has a crazy offensive board, you just want to use his Overkill to stop any battle destruction and penetrate damage.

To be honest, this slot in the deck is pretty flexible if you want to not run Shuten Kid Ibuki and want to add different cards. 

Dark Arms, Fiery Bloom - Violet Blades - The main weapon of the deck. The equip cost isn't terrible. Just 1 gauge and 1 life. It can attack through center even if there's an Oni Assassin the center. It can't be destroyed or bounced back to hand by the opponent's card effects and the last skill reduces the gauge cost of Oni Assassin monsters by 1 gauge.

This last effect is the key point of the deck. This item is why Uji Bridge Princess is enough gauge to sustain the deck and running Under the Table would be overkill on gauge.

Banquet for the Unrighteous - Banquet has 1 of 2 abilities you can choose from. The first is you can check the top 3 cards of the deck and grab a monster from among them and the rest goes to the drop. This helps with general consistency in the deck and drop zone set up.

The second lets you grab a card from drop and put it into the soul of a monster on your field. Depending on the state of the game, you have many options but ideally, you'll want to put Mountain Deity Kid Ibuki facedown into a Oni Horde's soul.

Ibuki's Encouragement - With Ibuki's Encouragement, you can either drop a soul from a card on the field and if you do, draw a card or, if the card itself is facedown in the soul of a card and sent to the drop, you gain a gauge and draw a card. I tend to use both abilities about 50/50. I'll sometimes even use the first skill on my turn to get Mountain Deity Kid Ibuki out onto the field. This card is just flexible in basically any situation.

House of Assassins, Oni Convoy - A set spell that you can only have one of on the field at a time. It's ability allows you to put a card from hand facedown into the soul of an Oni Assassin on the field and draw a card. This is mainly to help with making the quality of your hand better.

Midnight Bodyguard - An attack null where you can drop a soul card to gain a gauge and a life. Since the deck is closed center, this card can help reduce that threat. Also, if you want to trigger a facedown soul on the left or right or items instead of the center, you can do that by dropping the soul with this card.

Underhanded Means, Shedding Cycle - The best draw spell! At counter speed at any time, you can drop a face down soul from an Oni Assassin to gain 2 life and draw 2 cards. I run 4 because this can also be run on the opponent's turn so this shouldn't really clog up your hand. Also, because it's counter speed, you can counter when a card is played by your opponent. Effectively making Shedding Cycle "unnullifiable" because the max card chain is 2.

Hiding Oni - Another draw spell for the deck. You just drop a soul from a card on the field to gauge 1 and draw 2. Pretty straightforward.

Demon Way, Sakurafubuki - The best spell null in the game! Pay 2 life to nullify a spell. Just a good effect. Keep in mind it's limited to 1 in the deck.

Sideboard

Chess Break - Used to get rid of up to two set spells from the opponent's field by putting them back to the deck. There is virtually no protection against bouncing cards back to deck. The two biggest threats to just absolutely shutting down Oni Assassins is Invitation to Death Ground and Cherry Blossom Dance so if the opponent has those cards, absolutely add this card to the deck.

Promise of Rainbow - Mainly for decks that try to mill you to death. Oni Assassin decks can already go through a decent amount of their deck in one turn. The "rest a monster" effect is certainly not a bad option either so if you want more "attack nulls", you can run this card.

Rampaging Evil Demon, Akuro-oh - This is probably the most likely card you can switch out based on personal preferences. This is mainly to swap out Shuten Kid Ibuki out of the deck. I run this if some decks still don't have anti-destruction or, if his burn effect can clinch out the game. His burn effect is not dependent on cards being destroyed either so you can play it just to burn the opponent.

Monday, March 18, 2024

Deck Profile: Japanese Blade

My Japanese Blade/Blade Beasts deck is next up. There are a few techs in the deck but I don't think it's anything that's really out of the ordinary. Also, I'd like to specify the difference between Japanese Blades and Blade Beasts. All card types are Japanese Blade. Whether they're spells, monsters, items or impacts. The Blade Beasts attribute are only given to the monsters. Like always, if you want to see a video of this exact deck, check below for my YouTube video


Now, let's look at the deck list:


Size 1:

Size 2:

Items:

Spells:


Sideboard:

Main Deck

Like usual, the goal of a Japanese Blade deck is to get more effects for the Japanese Blades by having differently named Japanese Blade cards in the drop zone. To facilitate this, there are cards that help add cards from deck to drop or from field to drop. Lets start with the size 0s.


White Dew Blade Beast, Murasamemaru  - When Murasamemaru attacks, he allows you to equip an item from the drop by paying 1 life. Also, at the end of the turn, he is destroyed. I run this at one for a couple reason. First, it allows you to extend your battle phase a little bit but that's not super common. Second, if I'm missing one of my Japanese Blade weapons, I can re-equip it. Lastly, he's just another different Japanese Blade. 

I dont want him early game so I just run him at 1 where if I come across him late game, cool. He's probably useful. If I find him early on, I just charge and draw him and he'll just count to the differently named Japanese Blades in drop. He helps supplement the deck but I dont completely rely on him.

Weaver of Dream and Fate, Miko - Both of Miko's skills can potentially be helpful. You can call her to the field as extra protection for your items but more importantly, Japanese Blade fields tend to be open more often than not so direct attacks are pretty common. Also, Japanese Blades have pretty bad attack nulls for the archetype so Miko helps with that problem. Also, with Tojikiri Yasutsuna's tutor ability, it allows you to shuffle the Mikos at the bottom of the deck back into the middle of the deck.

Blade Beast of Ghostslash, Tojikiri Yasutsuna - Speaking of the good boy, we're onto Tojikiri Yasutsuna. He costs a hefty 2 gauge but he can search for any Japanese Blade monster/item in the deck and add it to your hand. So, he helps with consistency. Also, as long as there's at least one Japanese Blade in the drop (which you can get by just paying his 2 gauge), it gets a critical and penetrate. The bar for that is about as low as it can be.

Guardian Electrobeast, Goryou - Her check top 3 ability is just solid consistency for the deck and helps get more Japanese Blades to the drop. Remember that you do NOT have to show your opponent what card you get with her.

Blade Beast of Blinder, Mikazuki Munechika "Re:B" - Onto the Buddy! Boy does he have a wall of text. Lets run down it real quick. He costs 2 gauge but gets a soul, soulguard, move, penetrate and double attack. A little expensive but we have answer for that later.

With him on the field, all Japanese Blades can't be destroyed or bounce and they get 10,000 power and 1 critical. Not bad. Solid effects to keep the board a live.

Next is his ability "Stance Under the Moonlight". It states that when he enters the field put up to 3 different Japanese Blade (monster, item, spell or impact) from your deck into the drop zone. Then, if there are 5 or more Japanese Blade are in the drop, gain 2 gauge and draw 2 cards and "Stance Under the Moonlight" can only activate once per turn. So, he basically pays for himself plus 1 more card in hand. 

Everything about this card is solid which is why he's the buddy. Solid stats, solid effects, solid drop zone setup and solid advantage. You actually don't even lose advantage playing this card.

Mikazuki Munechika, "Forbidden Art Blade Deity Descends!" - The Japanese Blade impact monster. He's a little expensive at 3 gauge but if there's seven or more different Japanese Blade in the drop zone, he gains a critical and his attack can't be nullified. He also has innate move, penetrate, double attack and soulguard. I would say unless you know you can finish off the game, don't call this over Mikazuki Munechika Re:B. The card itself also just adds another different Japanese Blade to the deck worst case scenario.

Blade Beast of Sixteenth Night, Crane Princess Ichimonji - Ichimonji is a little expensive at 2 gauge but with her effect, where you discard a Japanese Blade from hand, you gain a gauge and a hand card back, her real cost is just 1 gauge. Also, if you have 3 or more different Japanese Blade in the drop, she gets 1 critical and move. Also, she has innate double attack and soulguard.

She's in the deck for a few reasons. First, her existence in the deck itself is another Japanese Blade. If you have the ideal field with Mikazuki Munechika Re:B, just send a copy of her to the drop. You don't need her in the deck at that point. Second, her effect helps filter your hand. Third, she helps set up the drop zone. Third, Hiding Oni is in the deck (explained further below) so you can remove her soul to gauge 1 and draw 2.

Famous Blade, Kogane-chidori - Moving onto the weapons of the deck! First up is Kogane-chidori. It costs a hefty 2 gauge. It has two abilities. First, if it's attacking alone, the attack damage can't be reduced which is nice but nothing special. 

The second ability is the more important ability. When you cast a spell, you gain a gauge and for the turn it gains double attack. Keep in mind this activates during both you and your opponent's attacks. Granted, the double attack won't do any good on the opponent's attack but a steady stream of gauge for a gauge heavy deck is nice. After casting a spell on your turn and another spell on your opponent's, you have regained the gauge used to equip the weapon. Anything more is free.

Also, with Mikazuki Munechika on the field, it becomes a 15,000 power, 3 critical double attacking item that can't be reduced which is a solid weapon.

Exquisite Sword, Crane Princess - Crane Princess (Ichimonji's weapon) isn't anything super special. It can only be equipped if there is a Blade Beast on the field which, shouldn't be a big deal. It costs only 1 gauge and its only ability is that it can be equipped along side another Japanese Blade. So, the only real reason why you run it is because you can. Granted, it does become a 17.000 power, 2 critical weapon with Mikazuki Munechika Re:B but that's nothing crazy. However, it's better than nothing.

Voice of the Blade - Moving onto the spells now. First up is a staple for Japanese Blade. Voice of the Blade is a set spell and you can only have 1 of it on the field. It's first effect is that the gauge cost of Blade Beasts is reduced by 1. Keep in mind only the monsters are Blade Beasts. This does not reduce the cost of the weapons.

It's second effect is you may discard a Japanese Blade from your hand. Then, check the top 3 cards of your deck and put up to two Japanese Blade from among them to your hand and the rest are discarded. Keep in mind, Japanese Blade is the attribute that spans across all the card types so you can grab any card with the attribute. Just remember to show your opponent what cards you're choosing.


Sword Skill, Zanteisettetsu - This card is usually used as an attack null because it can specify any Japanese Blade card on the field and if it's a monster, give it counterattack but, it can also be used to protect items from being destroyed. There's no other alternative kind of card for the deck so it's good just due to lack of options.

Celestial Arts, Returning Water - It's a pretty straightforward card. At counter speed, you can destroy your own monster to draw a card, gain a gauge and life. The main use for this is to destroy your own monster in the center to wiff an opponent's attack and their penetrate (if they have it). Worst case though, if you need more Japanese Blades in the drop, you can destroy a monster on the field. This is one card that I think if others prefer to swap this out for other cards, that's totally fine as well. This card is nice but certainly not a staple.

Hiding Oni - An Oni Assassin spell that lets you drop a soul from a card on the field to gauge 1 and draw two. Mikazuki Munechika Re:B and Ichimonji are really the only two that have souls.

Another alternative option is Demon Way, Akeshigure but Japanese Blades can be pretty gauge heavy where Hiding Oni gives you a gauge. That being said, if you have Kogane-chidori on the field, the gauge cost is basically free as well.

Clear Serenity - Pretty simple card. At counter speed at anytime, you gain 3 gauge. Japanese Blades have always been more on the gauge heavy side so I added Clear Serenity to help mitigate that issue. Also, you can play this during the opponent's turn and if you have Kogane-chidori on the field, you technically get 4 gauge so that's nice for impacts.

Blade Beast Formation, Shape of the Elite - The normal impact of the deck. It's run mainly because it's another Japanese Blade but, it's also not a difficult card to actually cast if you want. The only tough thing is the 3 gauge cost but that's why we run Clear Serenity.

Also, thanks to Clear Serenity, you can have no gauge during the battle phase, the opponent doesn't think you have anything else to attack and you can suddenly cast Clear Serenity and cast this impact to have another battle phase. If the opponent knew you had 3 gauge, they might cast their cards during the battle phase differently to better predict the impact. Waiting last minute to gain the gauge and impact call may make the opponent make unoptimized moves compared to if they knew the gauge was on the field.

Sideboard

Cherry Blossom Dance - It's a set spell with two abilities. First, if an item would leave the field, you may sacrifice the set spell instead to keep the item on the field. This helps keep your items from being messed with. The second ability prevents cards from being called from the drop so this will help against decks like Oni Assassins, Skull Warriors and MAX Dragons.

Buddy Block! - Used mainly for the second effect of only allowing up to 4 attacks in a turn. Some decks can do an obscene number of attacks that can't be handled normally. Buddy Block! helps with that.

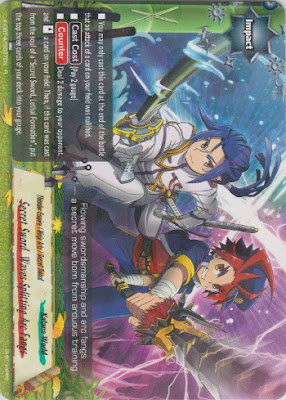
Secret Sword, Waves-Splitting Arc Fangs - An interesting card because it doesn't require Secret Sword, Lethal Formation to activate. When the opponent nullifies an attack, you may pay 2 gauge to burn the opponent for 2 and re-stand a card on the field (so it can attack again). If you play against a deck you know has attack nulls, you can run this card to punish the opponent and get your attacks back to try again. It's better to cast this card from a Secret Sword, Lethal Formation because you'll get 3 gauge back which brings us to our last card...

Secret Sword, Lethal Formation - This card is basically extra copies of Secret Sword, Waves-Splitting Arc Fangs with the added benefit of gaining 3 gauge. Also, this is not ideal but if Secret Sword, Lethal Formation has a soul underneath, you can use Hiding Oni to drop the soul and gauge 1 and draw 2. Again, not ideal but the option is there if push comes to shove.

Monday, March 4, 2024

Deck Profile: Water

Next up is my Water deck profile which, due to the lack of overall support for Water, can greatly vary. The core cards tend to stay the same, but the supporting cards can be pretty diverse so do not take the supporting cards as gospel. I'm just doing the best I can with limited support :(

Like usual, here's the YouTube video on the deck list as well:

My Water deck list:


Monsters:
Size 0:

Size 2:

Size 3:

Spells:

Sideboard:

Main Deck

Despite Water's name, its playstyle is pretty much set in stone. You play a field of size 3 Kannon on the left or right. Play either Size 2 Nanase in the center. Nanase's size gets reduced to 0 due to Kannon. Then, either size 0 Goishi Goma for gauge cost reduction, or Bibikawazu for the unnullifiable attack and sending Waters/Skull Warriors to drop. I usually send the 1 copy of CHAOS Gishingyuki from deck to drop. I'll explain his part in his section.

First Omni Beast Messenger, Goishi Goma - Since all the big monsters in the deck are size 2 or 3 Katana World monsters, their gauge cost is reduced by 1. Water does require a lot of gauge to set up so this helps reduce that cost.

Premature Passing, Bibikawazu - Helps for 1 of 3 reasons. First is to filter out cards you don't want to draw. For an example, if you already have your ideal board set up, take out other Nanases from the deck. Second, you can get your 1 of techs to the drop for later like Hundred Mechs General, CHAOS Gishingyuki or Humanoid Beast, Yaejako from the deck. Third is early game when you need 2 waters in the drop to call either Nanase. 

Also, with Nanase Re:B's ability, Bibikawazu can become a big 12,000/1/11,000 monster with double attack that can't be nullified if attacking a lone. Not bad for a size 0.

Guardian Electrobeast, Goryou - Just a good consistency card for the deck. Keep in mind, its size does NOT reduce with Kannon on the field so, minus size 0's, you have to play Goryou first. 

Speaking of size 0s, if you have Bibikawazu and Goryou in hand, play Bibikawazu first to help filter out some cards you may not want as options from Goryou then, play Goryou so your odds of getting cards you do want in hand are higher.

White Dragon Hermit, Nanase "Re:B" - The main size 2 you want on the field. He's free to call if you have Goishi Goma on the field. Also, before we get too far into him, he has a pretty major text error. The card's call cost says you "Put two Water from your field into his soul and pay 1 gauge". This is not correct. The correct call cost is "Put two Water from your drop zone into its soul and pay 1 gauge". 

Now onto his effects. First, he restricts your opponent's gauge to 2 at max. If they try to get more than 2 gauge at a time, the opponent has to send gauge to drop until they're down to 2. 

The next ability activates at the start of each player's battle phase. If the opponent has 1 or less gauge, you gain 2 life, draw a card and for the rest of the turn, all Waters get 10,000 attack and defense and double attack. 

To make this easier to activate, he also has a counter ability that lets you drop one of his souls to make the opponent lose a gauge so, even if the opponent has 2 gauge, you can force them down to 1 gauge to gain the 2 life, draw and bonus stats.

To top it all off, Nanase has innate penetrate, soulguard and counterattack. I wouldn't rely on the penetrate and counterattack too much but they're nice.

Celestial Deity of Misty Dew Water, Nanase - This Nanase is more for consistency to have "a" Nanase on the field. Re:B Nanase is the better option, but this is better than nothing. 

Regardless, lets run by its abilities really quick. He costs 2 gauge and 2 Waters from the drop into its soul. When he's destroyed, destroy an opponent's monster, you gain a gauge, and the opponent loses a gauge. He also has double attack and soulguard. Not bad but the monster destruction effect isn't great anymore, so you'll care more about the gauge gain/loss portion of the effect. Thankfully, the gauge gain/loss is NOT dependent on the monster being destroyed.

Also, if you do have Re:B Nanase on the field, you could use Bibikawazu's ability to send copies of this card to the drop since you won't need them in hand.

Heavenly Vengeance, Full-equip Kannon - The main size 3 for the field. He's a little expensive at 2 gauge but Goishi Goma can help reduce the cost. His first ability is what reduces Nanase to 0. His counter ability allows you to destroy a Skull Warrior or Water monster on your field other than Kannon to gain a gauge and 1 life. This is mainly to help with not getting penetrated but back in the day, it was used to trigger Misty Dew Water, Nanase's abilities. 

Hundred Mechs General, CHAOS Gishingyuki - This might seem like a weird 1 of but bear with me. Lets go over the abilities first and at that point, it should make sense. 

He costs 2 gauge and double attack. His size reduces if you have an originally size 3 Skull Warrior or Hundred Demon on the field. That means if you have Kannon on the field, Gishingyuki's size becomes 0. 

His last counter skill is called "Change of Parts" and lets you call him from the drop to the field by paying his call cost by putting a monster from the field to the drop. So, he's meant to be a small attack extender. Let's say you have Kannon, Re:B Nanase and either size 0 (Goishi Goma or Bibikawazu) on the field. Once they all attack, use Gishingyuki's Change of Parts skill to sacrifice the size 0, pay 2 gauge and call him to replace the size 0. He's more of a beat stick than a high crit threat but hey, two more attacks is better than nothing. Then, worst case, if you want to recoup some resources from Gishingyuki, destroy him with Kannon's skill.

In theory, you could call more copies of Gishingyuki by sacrificing Kannon and each Gishingyuki size reduces the other, but the gauge cost starts to get a little bit unrealistic and starts messing with your field, so I don't try to push for that and just run 1 copy of Gishingyuki.

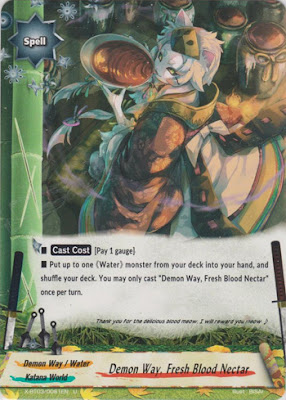
Demon Way, Fresh Blood Nectar - An absolutely needed Water tutor for the deck. For 1 gauge it lets you get your drop and hand ready for Re:B Nanase or Kannon if you have Nanase already.

Celestial Arts, Returning Water - Another good water card. Helps gain resources and cycle cards you don't need (like excessive Bibikawazus/Goishi Gomas). Also, helps with avoiding penetrate damage if Nanase has no more souls and is being attacked by a monster with penetrate.

Water Ploy, Kyokusuinoen - Help you recover critical cards that may have been destroyed. Remember that Kyokusuinoen can be activated by any destruction method. Be it attacks, Kannon or Celestial Arts, Returning Water. Also, Gishingyuki's "Change of Parts" skill does NOT destroy your monster so you cannot use Kyokusuinoen with him.

Hiding Oni - This deck's core cards have souls so you might as well exploit that and gain some gauge and cards to hand. I only run 2 because if you run more, you may clog your hand with too many Hiding Oni's and not enough set up cards so I played it safe at 2.

Art of Shadow Stitching - The attack null for the deck. If you play against a more weapon heavy deck, you can swap this out for other options but decks more than likely have monsters so this is a relatively safe card for the deck.

Clear Serenity - Used to help make sure Water has enough gauge to get the board going. Also, you can hide calling CHAOS Gishingyuki by waiting until after the last attack on the field, play Clear Serenity then call Gishingyuki. It might be the couple attacks your opponent doesn't calculate for.

Banquet for the Unrighteous - Serves two purposes. First, its another consistency card for the deck with its first ability but remember you can only grab monsters with Banquet. Second, soul charge ability is nice for Nanase to be able to drop another soul to drop the opponent's gauge and allow you to gain 2 life, draw 1 card and gain its buffs. 

Also, worst case scenario, give a monster a soul then use Hiding Oni to gauge and draw two. It's a -2 hand cards for +2 hand cards and a gauge so it's still a plus.

Demon Way, Sakurafubuki - Cheap and easy spell null. Nanase's 2 life and 1 draw gain makes this basically free. Remember its limited to 1 in a deck.

Sideboard

Cherry Blossom Dance - A good disruptor card for decks that frequently want to call from drop such as Skull Warriors, Oni Assassins or MAX Dragons.

Water Technique, Minawagakushi - Many decks have anti-destruction effects but not all have anti-bounce effects so this can help disrupt the opponent's turn. It's an expensive cost but can be useful and it's still a Water attribute card. 

Humanoid Beast, Yaejako - Mainly to help mess with decks that like to use set spells. You can always just destroy Yaejako after you use his summoning effect with Kannon or Celestial Arts, Returning Water. Keep in mind, Yaejako puts the set spell to drop so this gets around all the anti-destruction effects in the game.

Barbed Wire - One of many alternative attack nulls. This is mainly for Hero World. Another good option is Buddy Block!

That about sums up everything. The deck has pretty solid staples, but the secondary support is pretty minimal so there's a lot of flexibility and options. Some people will play more heavily into the Ninja Arts engine instead for example which certainly isn't a bad option.